Friday 25 January 2013

Primroses Step By Step 2013, Final Sttages.

Primroses in Watercolour
Creating the flowers and adding detail

Now it is time to put all the "Step by step on how to paint primroses" stages together. First you have your wonderful colour wash setting the atmosphere for your primrose painting.


Next you will have added centres


The next stage is painting the now practised negative edges around your flowers.This will make them stand out in your wash.

 Darker colour worked away from my negative petal edge gives me a wonderful effect.
Next you can add fine lines around the centre to create this part of the flower as final details.I use my personalised rigger for this detailed work as it is easier to control. This brush is available from my web site

Once you have a few realistic looking small primroses as practise studies aim to paint a cluster of flowers in a larger painting, including a few buds and some leaves. Look at the painting below and observe how some flowers are only half there. In fact is any one flower totally complete? 


Readers of my books will know I love leaving sections to the viewers imagination and this is what makes my  work interesting, to me it draws the viewer of my finished paintings into my emotional connection with each piece too.

You won't have perfect paintings straight away, but with practise and by playing with this technique you may surprise yourself in beautiful results that absolutely sing with life.

Please email me any paintings you are thrilled with or excited by

And my books can be found on Amazon.com or my web site.


***************

You can find my primrose washes on my first DVD, "Amazing Ways With Watercolour" , available from my web site and a clip of the DVD is on You Tube.

You will also find washes and techniques in both of my books. "Atmospheric Watercolours" teaches you about exciting washes, bleeding in and bleeding out techniques that will help you create soft beautiful petals.


Exhibition Updates

Exciting Horse Race Scene on my easel

I have had some wonderful emails asking me where I am as my blog has yet again fallen quiet. There is  so much going on and some  really exciting news to share but I have  had to focus on my painting as I am working on my solo show at the Wey Gallery which opens in March. I have  been to my framers so many times with wonderful new pieces as part of this ever growing exciting collection builds for my favourite time of year.

Often new artists imagine painting for a show means just that. Creating pieces to be put on display. But behind each new collection is a large amount of  work that involves taking photographs of every piece, choosing the right frames, measuring each painting, deciding on titles and prices.All the details have to be accurate for the gallery catalogue and my artists files.

So at the moment I have been  in communication with three galleries as my show in Devon has just opened. My show in Surrey opens in March and I will also be showing racehorse scenes in Cheltenham that month.

Here is my exhibition schedule for Spring.

The James Gallery
Jan-April 2013
A watercolour collection, solo show by
Jean Haines
Budleigh Salterton
Devon

"Essence of an Artist"
Major solo show with a variety of subjects.
The Wey Gallery
Opens March 22nd with a Private Preview
Watercolour Demonstration March 23rd

 The Montpelier Gallery
Cheltenham
Race Horse Paintings as part of a group show.

*****************


Monday 21 January 2013

Primroses in Watercolour : Further Exercises


Working from Negative Shapes.

In my latest book there is a chapter called " Positive Negativity ". I always believe strongly in postive thinking and I also love surrounding myself with positive people. There are times in life when we are legitimately allowed to feel low. But negative thinking in many ways can be so destructive. So from the beginning of every painting, please  try to feel positive about your results.  I should say this works not just in painting but in life too!

My last blog post on my step by step with primroses was for painting positive shapes. Now I want you to cover a scrap of paper with the shades you painted your primrose flowers in. Hopefully you have found great primrose shades that work well for you. My wash of colour is mainly diluted Cadmium Yellow.

Flowers shapes exercise next to a scrap of paper with  yellow painted on it.

Please let the yellow wash dry thoroughly.

Next stage?

Paint  the outline of a few flowers but be careful. You need to work colour around the flowers quickly before the line dries! The flower shapes don't have to be perfect at this stage.  They are just  giving you and idea of where you are going to place them and helping you practise your technique.

Negative outline for primroses

Now for the fun part! Add green quickly to surroundyour primroses and if you need to, now is the time to correct some of the petal shapes so that they do indeed look like primroses.

 
My background wash building up around the primroses  leaving negative shapes with  gorgeous creamy yellow colour for the flowers

If you study the image above you will see I have some detailed edges and some petal edges are blurred? These are called soft and hard edges and bring life to subjects in watercolour.

Now we need to allow this stage to dry and then we can add the centres from the previous blog post. If you want to, you can add leaves but please wait until you have painted the flowers first.

My last post  on this step by step will be tomorrow!

It is so much fun sharing my passion for watercolour on my blog. Thank you so much to every one who has been so kind sending me emails letting me know how much this step by step is being enjoyed. Maybe I can share seasonal step by steps throughout the year so we all have something to look forward to!

I hope to share a few primrose paintings by you on my blog so please email them to me when the step by step is complete!

Sunday 20 January 2013

Primrose Exercises and Practise

Primrose Shapes

I have had some wonderful emails from readers of my blog thanking me for my primrose step by step which has made me feel so happy. For me, painting is sheer joy. To keep that pleasure to myself would seem selfish.  I honestly love working in watercolour so much and if I can inspire others to enjoy this fantastic feeling,  I am thrilled. I did have one email from an established artist who is a friend of mine, asking why I am giving tuition for free online. They too paint flowers,  and prefer  for everyone to pay for workshops and all forms of tuition. But the way I see things is that nature is free. It is all around us and we can enjoy it, if we choose to. I couldn't paint primroses without  seeing their beauty naturally. I have waiting lists for places on my workshops and I know not everyone is able to get a place this year, nor can everyone travel to see me. So I am aiming to keep enthusiasm as high as I can by sharing on my blog  I also strongly believe that not everything in life should come with a price tag!

So lets' move on with more stages of working towards creating fabulous watercolours of primroses! You should  by now have practised washes which is the first stage. But on top of these washes you are going to work in two ways.
A) You are going to paint flower shapes like the ones above.

B) You are going to work negatively within your washes to give the illusion of the primroses in the composition which is a lovely way to work. You will make flowers without even painting them!

At the end of this exercise we put everything together and see what your results are in my final stage of this painting tutorial. So lets look at painting positive flower shapes first.


Painting Primrose Shapes.
Stage 1.

Do study  my text and images in this blog post because your taking time to get this part right will lead to a wonderful result when you work on your  main piece.

1)  Have several scraps of paper.
2) Have your primrose shades ready on your palette.
3) Work with a size 10 brush only

Now the exciting part!

4) Paint some primroses as you think they look. Study the petal shapes, they have  lovely, almost heart like edges at the outer petal. Look at my flowers  in the image below all painted ine one simple colour. Simplify, don't complicate your work. Keep it clean and fresh in this exercise.

 5) Have your flower shapes facing different directions for variety and added interest.

6) Don't have them all the same, paint some half flowers too!


Painting Primrose Shapes.
Stage 2.
Adding Centres.
 
When your shapes are dry you can add a stronger yellow for the centre of  each flower. Even with little detail you should be able to easily recognise the flowers as primroses. If you can't please keep practising as you will definitely get lost on the next and more complicated stage.
 
 
 Primrose centres added to  flower  shapes
I have allowed my "centre colour" to flow to the petal edge on some  flowers to create interest. I don't want any two looking identical!

Once you have two or three scraps of paper with beautiful primrose shapes on you are ready for the next and final stages. Please take your time on this part as it really helps you to get to know your subject. You can't paint anything well unless you understand how it is  formed.

For readers of my blog  who aren't able to see real primroses here is a photograph to help you paint this tutorial.

Primroses from my garden
 
.


Saturday 19 January 2013

Fox in Watercolour

A Fox appearing in Watercolour
Painting 1.

I have so many paintings I need to complete. Also two magazine features need writing and I am working on a solo exhibition at the Wey Gallery in March.  And I am having problems getting an art consignment delivery to a gallery in Devon due to bad weather. So you would imagine I would head for my studio today and carry on with everything that obviously is a priority?

No!

This morning I looked out of my window and saw the most beautiful sight. Here it is.

Fox in our garden this morning. Friends who visit won't recognise the scene as he is standing on what should be our lawn but now covered in heavy snow.

We have had very heavy snow yesterday and our grass is now all covered with a white blanket. I watched mesmerised as the fox , who nows visits daily for food , walked across the lawn to the waters edge. He almost posed as I took his photo. He is getting very tame and allows me to get quite near.

I have tried so hard to put him out of my mind as I had so much work to do but I couldn't. Which is why I found myself  painting him this afternoon.The first stage where the fox is slowly coming to life is at the top of this page. I have several images to work from so tomorrow I will be racing to my studio to work on him further and continue bring him to life.

As an artist it is so imporatnt to paint when the mood catches you and paint whatever your heart screams for you to  create, in whatever medium you love.

For me its' obviously watercolour!

Fox WIP from another photographic image from this mornings scene.

I think foxes are my new favourite subject!


Primrose Distraction?

Primroses work in progress

I am so sorry for the delay in  my adding the final stages of painting primroses to my blog. With the snow, hiccup on exhibition delivery yesterday and everything else going on behind the scenes, finding time to add here has been difficult.  Today I was distracted by a beautiful sight which I have simply had to put everything I am currently working on aside to paint.

See my next blog post for details!


Friday 18 January 2013

Happiness in the shape of a dog!

 Jumping For Joy, 
Its snowing!

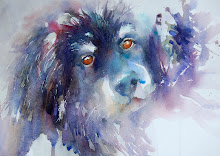
I am sorry not to have added to my blog today. We have had wonderful snow fall and I have taken time out to allow my dog Bailey to have fun in it. As you can see from the image above he has had a ball. He is a Bearded Collie and they love snow.


"Having Fun"

If Bailey isn't running in snow he is laying in it and eating it.


"Ice cream?"

When he has completely messed himself up by rolling in the snow, he scratches the snow off  his back by walking against the yew hedges


 And finally removes the rest with a good shake!


He makes me laugh daily and in all honesty, happiness for me comes in the shape of a very lovable dog!

I will be back online tomorrow with paintings I hope and I will continue with the last stages of my primrose step by step!


Thursday 17 January 2013

Step by Step Primroses : Stage 2. Flower Centres

Primrose Flower Centres

Painting Primroses Step By Step 
Stage2.

I love this next stage! Once your first wash is dry, for painting primroses,  you can add a few flower centre details. Please don't get carried away. Just a few is all you need.

1) Centre Detail.  I work with the rigger from my personalised brush sets which are available from my web site. It is a sable, flows well, loads with colour and is easy to direct fine lines with. Working with the tip of the fine rigger brush paint five small lines radiating in a circle around the centre of where you think your primroses could be. use your imagination and be creative. I start by painting with a loaded brush of strong colour and keep working with it on  one centre after the other until my brush has little colour on it. This gives me a variety of depth in my brushstrokes. Notice how the centre  colours are so much softer on some  flowers above? This effect is achieved purely by not reloading your brush with colour. So all your primroses will look slightly different. A very clever tip!

2) Joining the fine lines to make a central colour is next. So now load your brush with water and drop a little in the centre of the five small lines while they are still wet. The water draws the orange colour into a puddle in the middle of each flower. As it dries this will give you a gorgeous varied effect without you having to do anything at all. Other than perhaps get a cup of coffee before the next stage which is adding the negative outline of the flowers.

Its' easy so far isn't it?

You can watch a trailer of my DVD to see how I apply colour on my web site at the online shop. Look for the DVD section, here is where you will also find my personalised brushes for sale.

Step By Step Primroses . First Stage : Colourful Wash

Primroses
First Wash

Primroses Step By Step
Stage 1.

If you are following my blog and are interested in my step by steps this is  a great post for you!
I would like you to have a  fresh piece of white paper in front of you and for this exercise you can work with your paper flat on a work surface. I mention working flat as I often work with my paper at an angle. But for this particulr subject and this stage of painting I want all the colours to merge softly on their own without any help from us, as artists.

Imagine you have seen a cluster of flowers growing on a woodland bank or in your garden. Look at your white paper and imagine the top of the paper represents the sky area. The lower half of the paper is the grass,woodland leaves or ground that the primroses are to flower from. So these sections will be where you add colour to depict what you feel makes a great background. You can choose any colours you liek to surround your flowers. Be unique! Study my wash in the above image. 

For those of you new to watercolour, a wash is a term used for when you cover paper with colour when working with watercolour. There is more information on techniques in my two books and DVDs but for now I am going to talk you through how I have covered my paper with colour for this first stage.

1) On DRY paper,constantly moving my brush in sweeps across the paper, I applied pale yellow in the central area of my paper.

2) Working away from this  yellow wet section I introduced violet, allowing it to connect with the yellow and moved my brush downwards to the  lower corners. 

3) Above the yellow I worked with  diluted Cerulean Blue working to the upper corners. I haven't been precise. I have been very relaxed and quite messy, allowing colours to flow into each other  where they meet and connect.

4) My paper is now covered with colour but while my  pigment is still wet  I have loaded my size 10 brush with Cerulean Blue and flicked it onto the violet section allowing it to merge with the yellow and violet areas. This allows the colours to form a "new" mixed shade of green here that harmonises with the blue in the upper section.

5) With a very clean brush , I then loaded yellow onto my sable and flicked it onto the wet  yellow section. This left a few darker dots for flower centres to be added later.

6) Leave this to dry. Do NOT fiddle! Don't try to paint flowers or leaves. Just allow the colours to merge gently on their own.

IMPORTANT! The colour needs to be very pale so we can build up in layers once it is dry.

Variations. 

How about working with orange or gold against your  yellow to represent an autumnal feel to the background as primroses often burst through golden carpets of woodlands. Or all blue around the yellow for a summer atmosphere of light freshness.

Try a few washes, avoid white areas on the paper and be gentle with your brush!

Take your time and enjoy watching paint dry, I do!


Tuesday 15 January 2013

Primrose Madness or Spring Fever

Primrose Seduction
Work in progress

It happens. When a subject gets  completely into my mind I can't stop painting it! I have had such a glorious studio day working on paintings for my solo exhibition. At the close of day I added to my current watercolour of a cluster of primroses which I have been sharing on my blog. Because that looked so lovely I decided to start a new piece so that tomorrow I can look forward to something new to work on. This way of working stops me racing to finish the existing beautiful almost finsihed painting of primroses.

As I worked on my new wash, I thought about Spring and how each year, I love planting my flower pots and garden tubs with vibrant primroses and primulas from the garden centres. When I buy them I see  rows and rows of glorious colours, so I  started painting from my imagination all the plants I would like to buy. I saw pink, purple, white and yellow primulas in my mind so my wild flowers flew out of the window as this gorgeous long composition started taking shape. Its' full of light and life and I can't wait for tomorrow to arrive so I can add to this piece too!

What a wonderful way to live. Loving life and painting.


Wey Gallery Exhibition and Demonstration March 2013

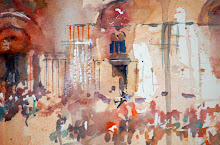
Venice coming to Life
Architectural Watercolour

I am currently working on a  watercolour collection for my show in Godalming at the Wey Gallery this March. My solo exhibition will open on Friday 22nd March with a Private Preview. On Saturday 23rd March,  I will be giving a demonstration at the gallery, covering subjects in my way of approaching a watercolour.

This particular show is going to be a major 2013 event with many favourite subjects included in my new collection. There, as always, will be a few surprises. In recent years red dots have appeared very quickly at the  gallery openings,especially over the first few days. Please visit early if you are interested or call the gallery directly if there is a piece you may be looking for . There is a new "Lucky Hare"  and I honestly can't wait to see all the paintings displayed.

If you re interested in the Preview or the Demonstration  please give the gallery a call for full details.

Primroses Step by Step : Colour Choices and materials.

 Watercolour Shades for painting primroses in watercolour


I am hoping everyone reading my blog is eager to paint primroses and as promised  this opening post is to discuss which products I use.

One of the main hiccups I find when taking workshops is the manic race for everyone attending to start painting straight away! Often artists look at a white piece of paper and rush to cover it with colour without even seriously thinking of their subject or how they are going to capture it really well. They just want to paint and go for it at the stage when thinking really is the most  beneficial option!nd 

Tip 1. Always start a painting with mental colour options.

Studying a subject to choose the best colours to portray it is vitally important. Over the years I have painted so many floral pieces and as any botanical artist will tell you if the colour isn't right,  no matter how beautiful your result , your painting won't  really tell the true story of the flower you are painting. So please take your time at this stage to get everything absolutely right.

First, choose the colour for your main subject,in this case the primroses, and then we can look at background colour options for contrast. Finding the right yellow isn't easy because if you study a primrose they are not really yellow at all! They are a beautiful soft creamy lemon shade and I always see hints of delicate turquoise in the petals. Does any watercolour manufacturer make a perfect colour match for this yellow? Or is it easier to mix our own shades? I would love to know your favourite  choices.

I used to always mix my own colour for ALL subjects but now I am having fun trying out new products by a variety of manufacturers. For this exercise I can really recommend "Scminke  Jaune Brilliant Dark".  I know everyone is going to think, "oh no, I need to buy a new colour" but this one is so gorgeous to use for all kinds of subjects, not just flowers, so it is well worth getting.

Alternatively you can try Winsor & Newton Lemon Yellow but it isn't the same!

Paper? I always use heavy weight paper but for this exercise I am happy working on Bockingford 140lbs weight. Rough or Smooth surface. For flowerr I usually use a smooth surface. Once you have made a few fantastic  paintings with great results move to a better weight like Arches.

Nice clean water pots are essential!

Brushes? I am working  with my personalised brush sets. My size 10 sable for all the main work but my rigger for last minute details like the flower centres.  

 I mentioned   choosing  background colours to contrast and we need to " Think Spring" in this piece. Opera Rose will give a lovely glow but I am opting for Cerulean Blue for the sky and upper background, for the lower  background I will use Winsor Violet . French Ultramarine  and the Cerulean Blue mixed with my yellow will give me gorgeous green shades but we won't be mixing these in the palette! I could use a small amount of Turquoise too but will see how things progress!

So now you should have everything you need, and next we start the washes. Yes, I do mean washes because I want you to paint more than one!

****************

I am going to add to this step by step daily and hopefully you will be able to email me some fantastic   painting images when this tutorial is finished. The best I intend to share on my blog.


Monday 14 January 2013

USA 2013 and 2014 : Workshop Invitations

Just a quick blog post to say I have received some wonderful invitations  to hold workshops in USA in both 2013 and 2014.

I will be visiting New York and Texas again in 2013 and these workshops are already in the process of accepting bookings. I am currently looking at the possibility of adding to this trip.  

I still have time to look at destinations for 2014 but I will be confirming my diary and commitments fairly soon so please, if you are interested could you contact me now , as soon as possible on

jeanhaines@hotmail.com

**************
I will be  holding workshops in Australia and Hong Kong  in April this year, and USA in October/November 2013

Full details will be on my web site


I will also be in Italy in 2014!

***********


Painting Primroses: Spring 2013


Primrose Step by Step in Watercolour

 Choosing Colours of Springtime

I really didn't think I would make it to my blog today as I had so much to do. First, I knew I needed to complete my catalogue for my exhibition in Devon at the end of this month. Next I had to deliver artwork to be framed for my show in Godalming. The collection is large  so it is taking time to  complete.

 The weather  today here saw snow and sleet making the roads difficut to manoeuvre,visibility was awful. But I managed to get there and back in one piece so here I am.  And I promised to share how I paint primroses on my blog this week, so I hope someone is eagerly waiting for me to share my technique.   If you are reading this, it could be you!

We are going to take a simple wash like this to the next stage of finding flowers in it.
 
 
 First stage wash for primroses
Not quite as easy as it looks but I have tips to share!

I am lucky in that I have real primroses flowering in my garden at the moment so I will share mine with you for this exercise and step by step. 

In the next image you can see how I matched the colour of the real flower with colours selected for my painting of them. That yellow isn't  easy to achieve either. Again I have a few tips to share!

Colour matching  to make the subject seem more alive.
(Real flower placed alongside my wash to show how true the colours chosen are.)

Tomorrow we will look at the  materials you will need, as in paper and fabulous shades  to work with, then we will begin!

Be ready and as a tip please think of Spring in your imagination and all the colours you "think" you see for that season and lets' see if we can bring them alive!

I will start by sharing the products and colours I use and how to create the first wash and stages to  almost feel the subject in the first stages.

Roll on tomorrow!

Sunday 13 January 2013

Primroses in Watercolour 2013

Primroses coming to life in watercolour 2013

I have had the most incredible studio day. Having promised myself a break from painting I gave up as my heart was screaming at me to paint. I have loved working on some spring florals which kept my mood light and  also really wound me up about my week ahead preparing for my exhibition. I can't wait for tomorrow to arrive now.

I have shared a few stages of the above work in progress on my Twitter and facebook pages. But tomorrow I hope to inspire on my blog talking about  why I choose the colours I do and making the first washes and creative stages to create beautiful flowers in watercolour.

So I hope you have time to check out my blog this week!

Happy painting!

Jean

Artist Tips 2013 : Take Your Time

 Snowdrop Paintings are now  coming to life for my new 2013 collections. While I work I can't help but think about how I have changed as an artist over the years. I think, when we first start painting we are so happy if our work shows recognisable subjects when our paintings are complete.  This is many artists goal and with this end comes a sense of achievement. We go through stages of disappointment when we first start out desperately trying to get good results which often can lead us to racing through each painting. Having to paint everything in one go to the point that if things don't go as planned we can feel let down. All new artists go through this stage.

Compare painting to going on a journey. Imagine you are drving from A to B because if you do, one really can see how taking breaks  or making stops can lead us to successful outcomes. I am married to someone who is fantastic but if we set out on a trip  his mission is to just get there.  We go from A to B and reach our destination. When I drive alone I am often tempted to stop and admire a building or  beautiful sight along the way.  I don't mind how long it takes me to get there as i want to enjoy the journey. Recently I persuaded my husband to stop and  visit a rodeo in Texas when we had left one destination and were making our way to Dallas by road. It was a fantastic day which we both enjoyed. Totally unexpected we saw a live rodeo, as we had made no plans other than just getting to where we were headed. That stop enriched our trip and allowed us both to see something we had genuinely longed to see.

So when you are painting, take breaks. Don't be in a constant race to get to the finish line and enjoy every stage of your work. If you study a half finished painting it will often tell you what you need to know and what is needed in the next brushstrokes. If you race to finish a piece  you may lose sight of the beauty that was there all the time in front of your eyes.

That lovely expression "take time to stop and smell the roses" is so true. Don't miss out by your determination to get somewhere. Enjoy the journey, where ever it leads you and  really indulge in those wonderful spur of the moment suprises which can enrich your life and you art.


Snowdrop Glow


 Snowdrop Glow

 It is a wonderful Sunday. The light today has been incredible. I had promised myself a break,  intending to stay out of my studio, to enjoy the  unexpected sunshine. I just couldn't resist dropping into my haven to see whats on my easel and possibly paint primroses which are playing on my mind. I can't wat for the first of the Spring flowers to bloom this year. After writing "Atmospheric Watercolours" and "How to Paint Colour and Light in Watercolour", my own chapters previously written are strongly playing on my mind. I keep thinking of why I paint floral subjects in the way that I do and how my style has evolevd over the years. I want to experimant further and aim, as always, to paint flowers in a way that breathes life into the  completed compositions. That is my way and now, how I am known as an artist.

Walking into my studio I was faced with the painting of  snowdrops that I started, and reluctantly left to complete. Th epainting looks beautiful as it has a soft glow reminding me of the sunshine outside and all the colours yet to come this year.

This is a terrific way to start 2013, looking forward to exhibitions, writing my next book and  knowing I will be meeting so many new friends when I take watercolour workshops in UK, Australia, Hong Kong, Texas and New York this year.

For now I just want to paint quietly and enjoy the freedom of doing so on a peaceful glorious Sunday!


Friday 11 January 2013

James Gallery Solo Exhibition January 2013

Gentle Giant
From a collection of original watercolours at the 

James Gallery
Budleigh Salterton
Devon 

Opening on January 24th, 2013 

My new collection of greeting card designs along with the original paintings will be on sale at the gallery during the exhibition.
 Early visits are advisable.

  
For  full details please contact the gallery directly

Snowdrops 2013

Snowdrops coming to life  as a work in progress

Not a year goes by where I don't feel compelled to paint snowdrops. I adore these little flowers. Considering they face the bad weather to bloom, bringing hints of  warmer days to come  each Springtime.

In the past I have usually painted them with  blue ,violet or turquoise backdrops using a variety of texture effects. For some reason those colour  combinaions were not my first choice as I painted in my studio today. I opted for pinks and yellows to brighten up what could have been a very cool wash. There is a wonderful sense of movement appearing at this stage as I love how the delicate heads  of the real flowers nod in the slightest of breezes.

It is incredible how much we think about when painting the simplest of subjects. I can't wait to finish this piece and start a new one too to see where the snowdrop journey of 2013 will lead me!

Artist Tip: Look at a subject you painted last year and see if you paint it differently this year. Use different colour combinations or change your usual composition. Aim for the unique and have confidence in your choices!

Wednesday 9 January 2013

Card Designs 2013

Greeting Cards 2013

The proofs of my new card designs for 2013 have arrived this morning and they look fabulous!

The above cards are all from original paintings that will be in my solo exhibition at the James Gallery in Budleigh Salterton which opens  on 24th January 2013. Please contact the gallery directly if you are interested in any favourite subjects or artwork.

These cards will be  available for sale later this year so please watch my web site for full details and updates. Only a few sets are left from 2012. Its' worth taking a look at my online shop as I do not repeat designs once they have sold out!

They Call It Hump Day!

Camel from my latest book
"Atmospheric Watercolours"


What a great start to 2013! Yesterday I had  the very first meeting with my publisher to discuss my next book.  It was such a fabulous day and as my book is in its infancy stage there are so many incredible options I could include as my next publication. 

Since writing "Atmospheric Watercolours" I have grown so much as an artist. By writing it I felt as though I was on an art course with myself on an exclusive one to one workshop. I could explore all the techniques I love so much and discover new ways of working with each. My watercolour workshops have helped so much in that  I was, and still am, constantly meeting artists with problems I hadn't come across before or even considered. For example I took it for granted that everyone knew how to use salt but I was wrong and there are many ways of creating  a  huge number of effects with its application. I also took it for granted that using cling film was an easy thing to do as the idea has been around  for years. But simple subtle changes in how we apply it with a little thought beforehand can bring enormous benefits. I love the questions that have come my way even down to asking me what water I prefer to use when painting,which as a question at first had me stumped. But there are artists  who don't like me, simply work with tap water.

In the last year while I haven't been working on a book I have travelled and had time to work on my exhibition collection. Many paintings I have kept under wraps until my major solo opens later this year because I want them to be a surprise when they are first seen. As my technique has evolved yet again with new colour combinations and ways of working. This is natural in an enthusiastic artists life and everyone who has met me knows how passionate I am about working in watercolour.

The good news is  I have a lot of  fabulous subjects to include in my next book which are completely new to me and seriously exciting. I will use some of the techniques that have been included in my last book but they will be very tempting to follow in new ways with new colour ideas! My journey from my first book has seen me move from one  amazing event in my art career to the next. I would love everyone who adores watercolour, or has goals of being a professional artist, or for professional artists who are tired in their career to read my next new book and feel exhilarated in a way they have never been before. The bad news is I will be working on this new publication for some time to come as it is a massive project but its going to be so worth waiting for!

So please experiment and practise with the techniques from my current book because my art life is an adventure that just keeps getting more and more exciting and I would love your art journey to be thrilling too.

There are currently only twelve copies of "Atmospheric Watercolour " available on Amazon.com but it has gone into reprint again and more will be available soon! Please order now if you want one quickly!


Signed copies are currently still available on my web site

Saturday 5 January 2013

Wonderful Year

Elephant coming to life in Watercolour

This may sound crazy but I knew this was going to be a great painting day as soon as I woke. I had made my mind up yesterday, to take a break and stay out of my studio today but the urge was far too great .  Which is why I  found myself  facing a gorgeous blank piece of paper  on my easel as the temptation to paint was too huge to resist. 

But in one way I did take a break as I strayed from my new collection, chose smooth paper which I usually don't wotk with and selected colours that were slightly different for my normal palette. As my brush worked its magic an elephant soon started to  not only appear on my paper but also turn to look at me. At one point I even thought it was winking!

Maybe I do need that break after all but this was such a peaceful and beautiful painting to create. The colours glowed and intereacted perfectly and I really could feel this majestic creature come to life under my brush.

Days like this are magical!

Have a brilliant year ahead. Paint as if there is no tomorrow, follow your urges to create when the mood hits you!


Friday 4 January 2013

Glow Magazine Interview January 2012


 My blog falls quiet when I have  many projects on the go and I am so sorry that it does. Finding time to juggle so much that  is happening in my life isn't easy these days! Behind the scenes I have been communicating with USA, Australia, Italy and Hong Kong regarding future watercolour workshops and book signing events. I am also working on a major solo in Spring this year.

A short while ago I was approached and invited to be a guest artist for Glow Magazine. I agreed to an interesting interview with Angela Woods. I find it completely fascinating, reading questions raised when these opportunities arise. This particular interview honestly did make me stop and think about how my art career started and why I feel as passionate as I do about sharing my love of watercolour. So if you have time to read this, maybe grab a cup of coffee and catch up with what I have been doing,who I am and why I paint via this frank and honest feature.


James Gallery, Budleigh Salterton. Solo Exhibition

"Gentle Giant"

The James Gallery
Budleigh Salterton
Devon

Solo exhibition running from 24th January  through until the beginning of April 2013

*************
I am delighted to have been invited to hold a solo exhibition at the James Gallery in Budleigh Salterton. My collection of original watercolours includes many favourite subjects including sheep,cockerels, dogs and horse racing scenes as well as beautiful floral pieces and "Gentle Giant", my only elephant painting at present which is being framed in preparation for the show.

Full details can be found on the venue via this link